The Simple Way to make your Steel Shed Base
Laying a base for a steel shed was once a very laborious and slow process. Pouring concrete is often very messy for the average Joe Soap. On top of that, it takes a while to set – and it can be held up by bad weather. Laying Slabs isn’t too difficult, but it’s more effort than I wanted to expend. Nowadays, there is a far easier solution: Shed Bases.
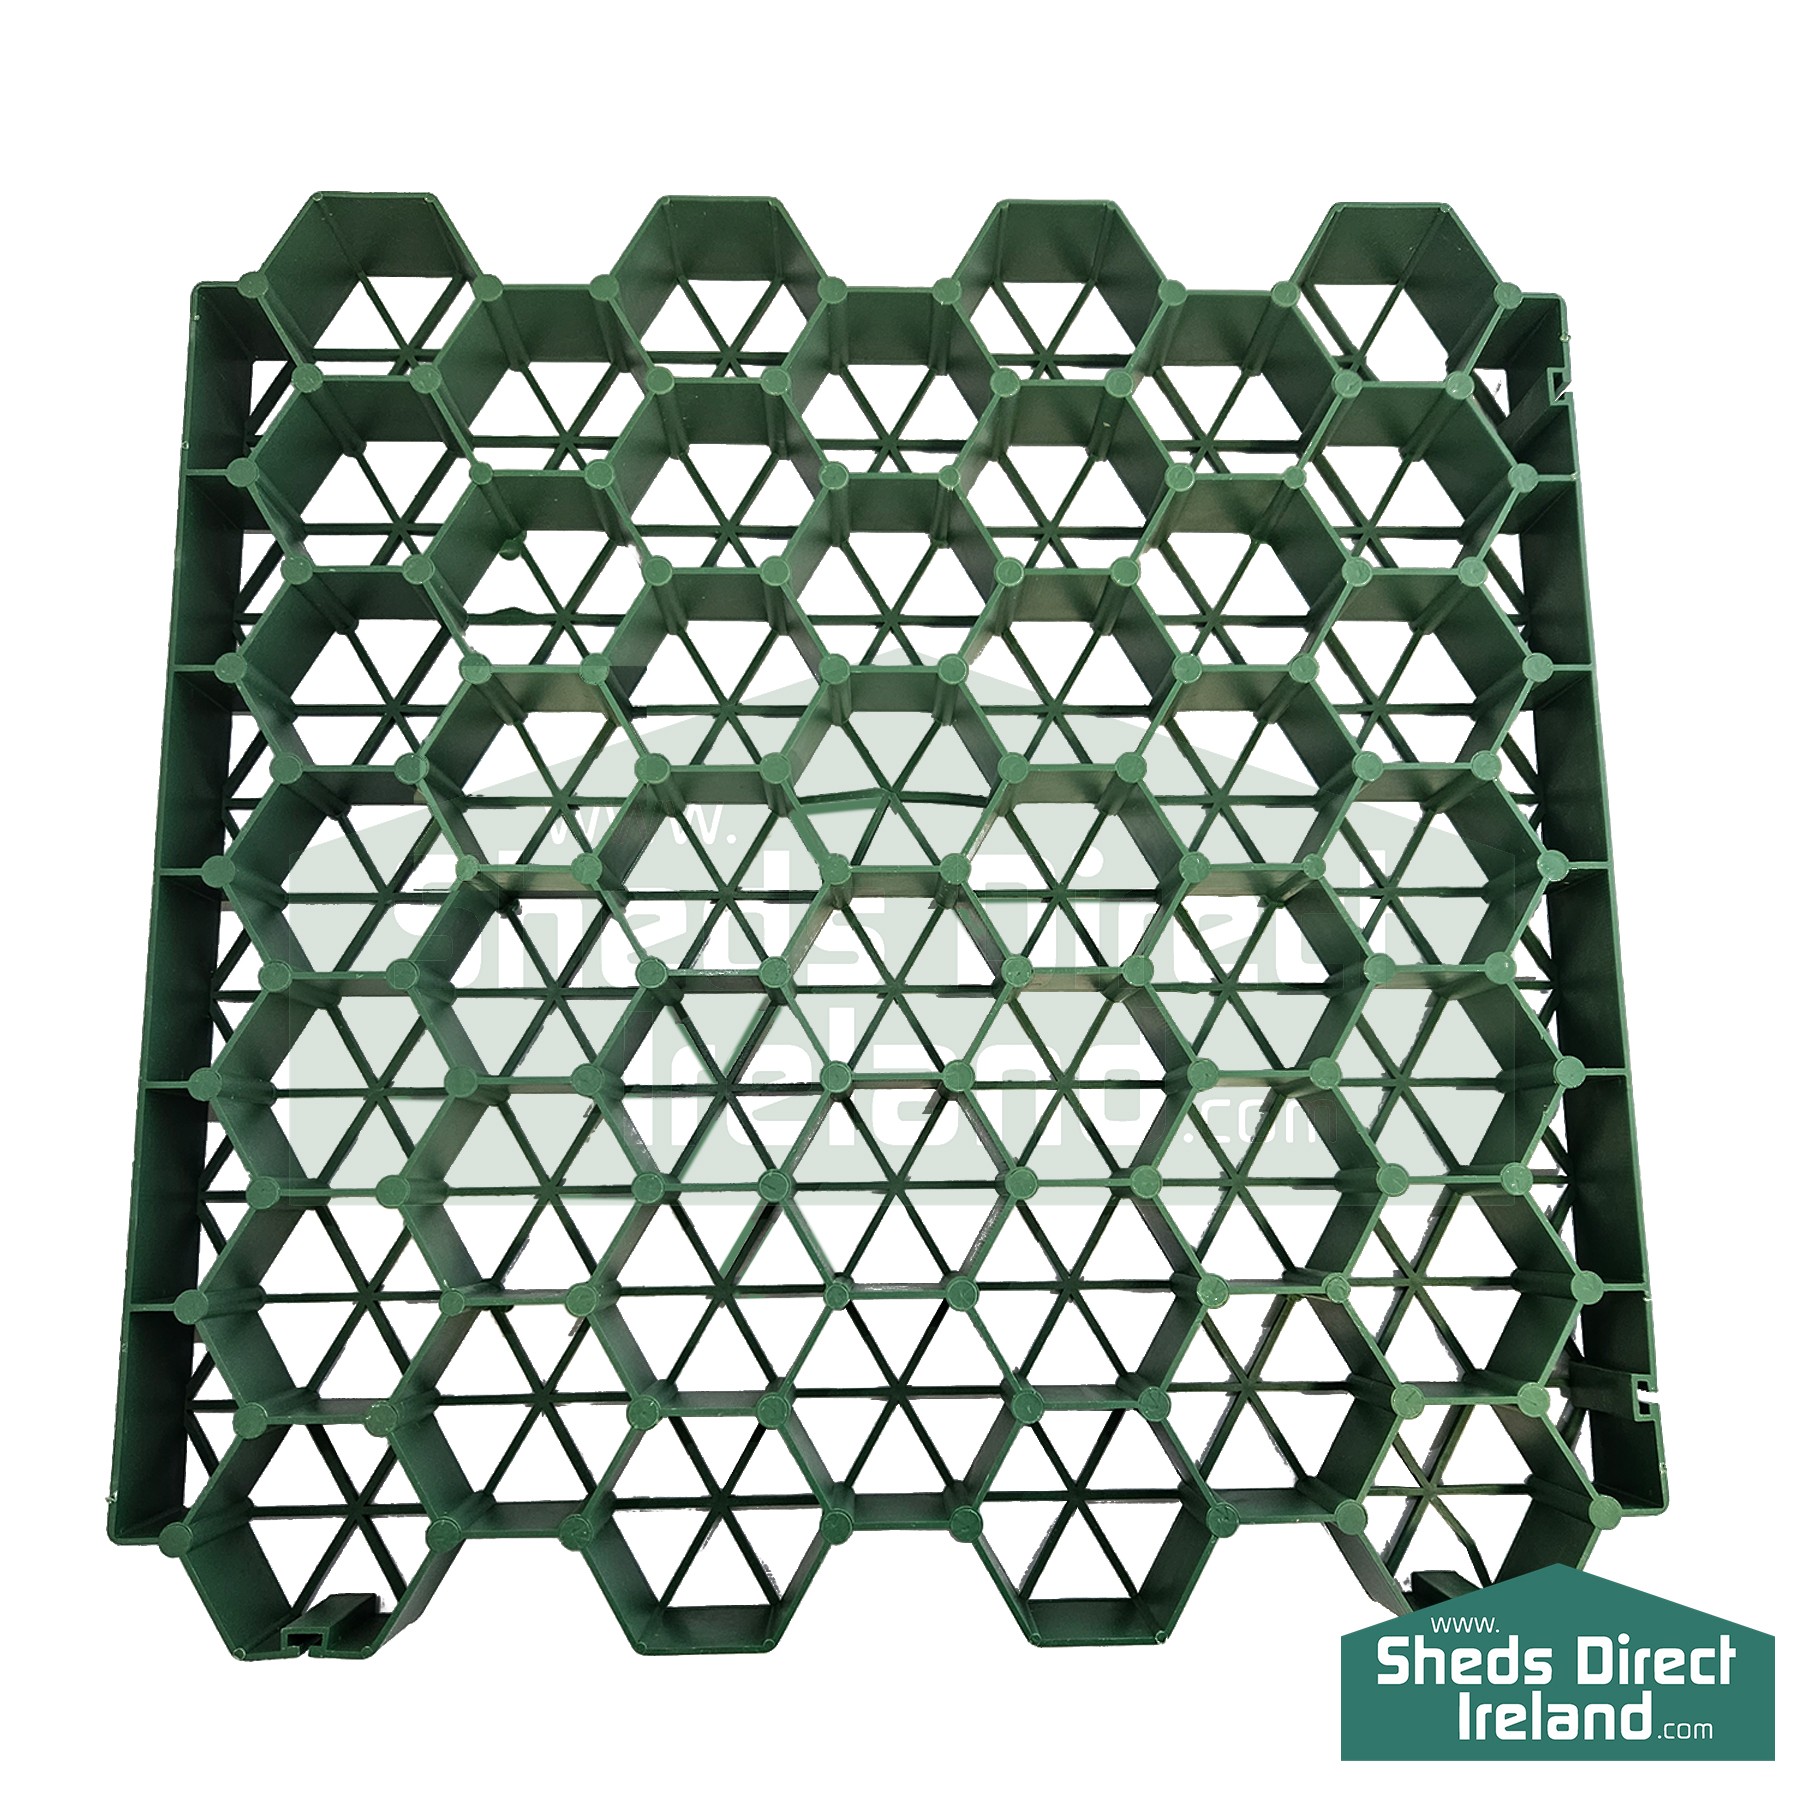
What are Shed Bases?
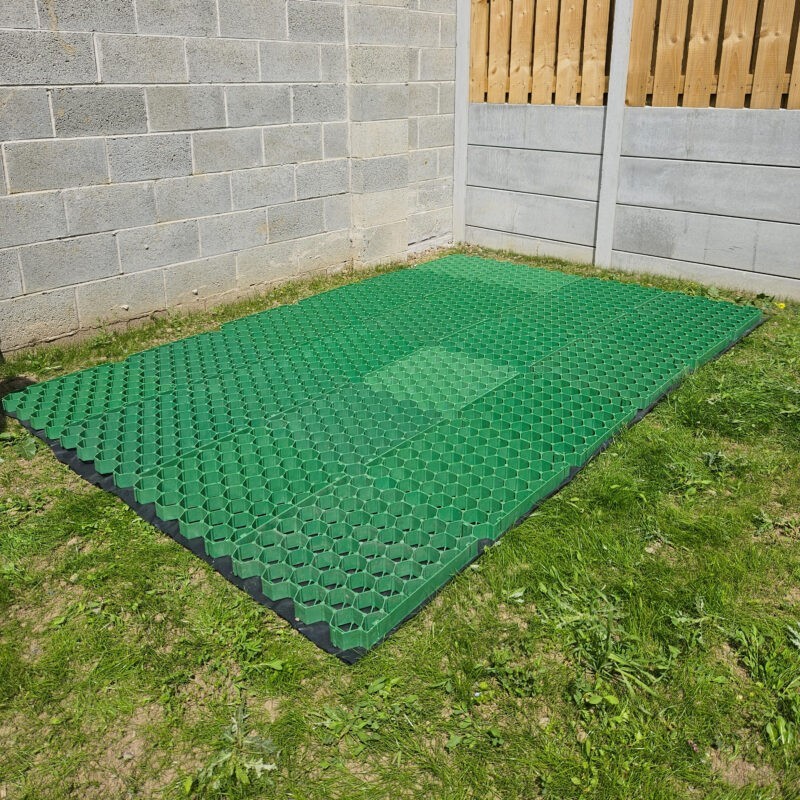
Our Shed Bases are polycarbonate grids that connect together at each side. They have deep cavities that need to be filled with sand, gravel, grit etc. Once they are filled up, they provide a base that’s solid enough for a Sheds Direct Ireland steel shed to sit on. These offer a quick, reliable alternative to pouring concrete or laying slabs and they go together quicker than teenagers at a junior disco. To say that these bases will make your life (and my life) considerably easier, is the understatement of the year.
How do I do I lay a base for my Steel Shed?
To put it simply, there are 7 steps
- Measure out your base
- Place a damp proof membrane in the area and cover with level layer of gravel / sand.
- Place Shed Base onto this layer of gravel / sand.
- Fill Shed Base with gravel / sand etc.
- Smooth out the surface so that there is nothing protruding out and also make sure that all holes are suitably filled in.
- Make sure it’s level
- Place shed on top of this!
- (Optional) Tell everyone at all future social occasions about that you, yes you, built a base for your garden shed.
I mean, it really is that simple. But if you need more convincing, read on. I’ll bore the arse off of you below with specifics!
1. Measure out your base (and the damp proof membrane at the same time!)
First off, measure up the space for your shed.
Properly measure it up.
If your auld lad is goose-stepping up the garden, trying to convert furlongs into inches and back into centimeters, you’ve already gone astray. Get the tape out and measure the space specifically. Add an extra few centimetres for safety too. Use this time to measure out your damp-proof membrane too, like so:
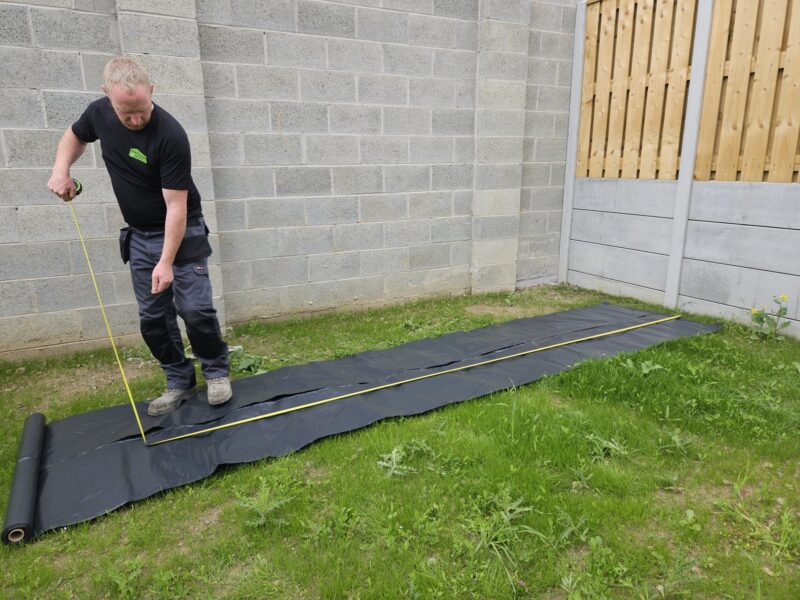
Once you’ve gotten the size of your shed and your membrane measured out, make sure that the Shed Base will fit on this space; you may need to adjust the membrane, but generally speaking you, should be alright.
2. Place your damp-proof membrane and cover with gravel
Damp Proof Membranes, are, as the name might suggest, membranes that prevent damp rising up into your shed. Some people say that the membranes aren’t necessary, but they are key in preventing condensation forming in steel sheds, so we strongly recommend them (read more about condensation in steel sheds here). We recommend 1000 gauge membrane. You’ll pick it up in any hardware store and they sell it by the roll. At the time of writing (May ’23), a small roll should set you back about €30 and a large roll costs about €70. Unfortunately, if you decide to not at the membrane before you lay your base, you won’t have a chance to add it in the future.
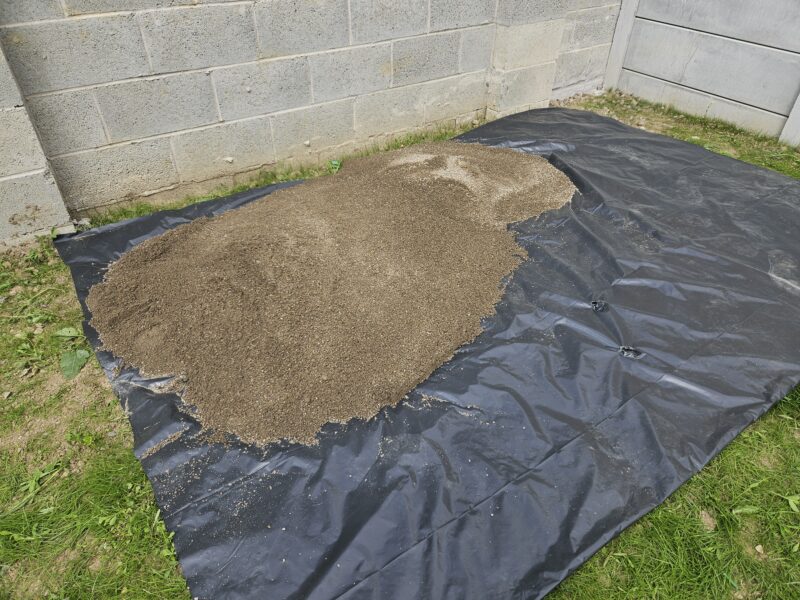
Simply lay this membrane on the ground and add a layer of gravel. This gravel keeps the base in place, but it can also be smoothed out to provide a level base (if you didn’t have one already). If your garden is particularly lumpy or bumpy, you may need extra gravel to help even it out easily. The above image shows how much gravel we used for a 10ft x 6ft cottage shed’s base.
The most important part here is to make sure that you get a level finish.
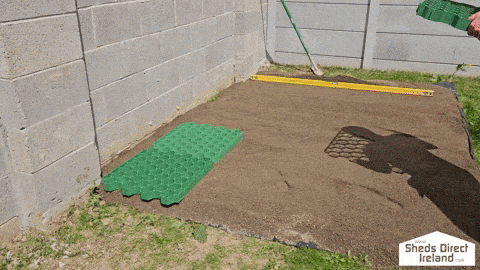
3. Place Shed Base onto this layer of gravel.
This bit is nice and easy, simply plonk the bases down and connect up the edges, like this:
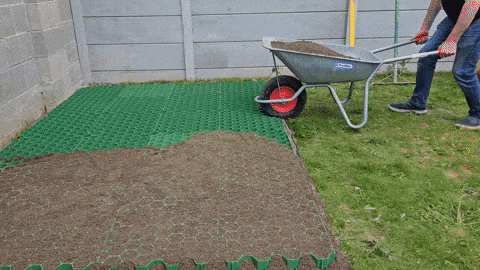
4. Fill Shed Base with gravel.
This is the fun bit. If there’s a young lad with a bit of divilment in his eyes, he’s the man for this job. In this case, Alan was our man. Simply dump the gravel onto the top of the Shed Base and manoeuvre it around to fill in all the gaps.
5. Smooth out the surface so that there is nothing protruding out and also make sure that all holes are suitably filled in.
Again, this one is pretty simple. Using a Levelling Rake (or the back of a regular rake, if you’re particularly lazy), work your way around the base making sure that each cavity is filled in and that there are no overspills anywhere else. You can see the second person in the gif below is walking after the person raking, pushing down any protrusions and making sure that the edges are sitting correctly.

6. Make sure it’s level
Making sure the base is level is pretty important for all sheds – but for any shed with hinged doors (e.g. The Cottage range), it’s vital. An uneven base will cause issues with hinged doors from lining up when you get to the assembly – and it’s considerably easier to level out a base than it is to force a door into a place that it physically won’t fit into because the base is off. Remember to make sure that both the length and the width of the shed are level.
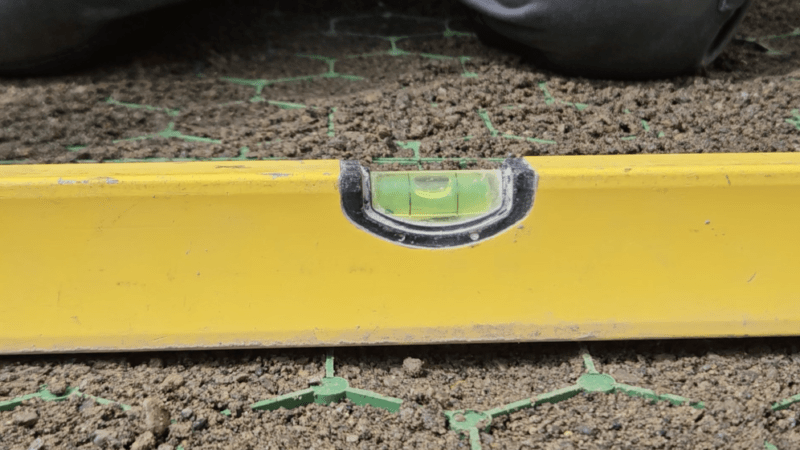
If you’re not level, you may need to pull up sections of the Shed Base and apply/remove a portion of gravel to get it level.
7. Place your shed on top of this
That’s really it. Once you’ve done all of the above, you’re ready to start building your garden shed on top of it.
Is that really it? No catches?
For the vast majority of cases, that is it. There are some exceptions to all of this however. These include:
- Exposed Areas: In exposed areas, we strongly recommend bolting your shed to the base. However this is not possible with a Shed Base, so we don’t recommend them if your garden is exposed to high winds, etc.
- Your base needs to be level before you begin. If it’s not, the Shed Base is not going to solve a problem by itself. As mentioned above, gravel can be used to level out the ground to accommodate the Shed Base.
- Sloped Gardens: If your garden is on a light slope and you’ve levelled it out, you may need to look at compacting the gravel into the base. Otherwise, Father Time and Mother Nature will eventually push out all that gravel. Applying one buckets-worth of concrete to the edges should suffice, just make sure not to get the concrete onto the steel of the shed when you’re applying. However, if you’re not experience in this area, we advise getting a professional in to do your base correctly in this instance.
If you’ve any particular questions that aren’t mentioned here, give us a call at 01 864 4247 or send us a message on Facebook or Instagram and we’ll get an answer for you.
Order your Shed Base
Order your shed base here or add it on with any steel shed.