


How To
How to set up a Water Feature

Jun
How to set up a Water Feature
Today we’ll be looking at how to set up your new Water Feature from Sheds Direct Ireland. It’s a simple process, so this shouldn’t take long, but this 2-minute read should provide helpful tips to anyone who has already, or is about to purchase one.
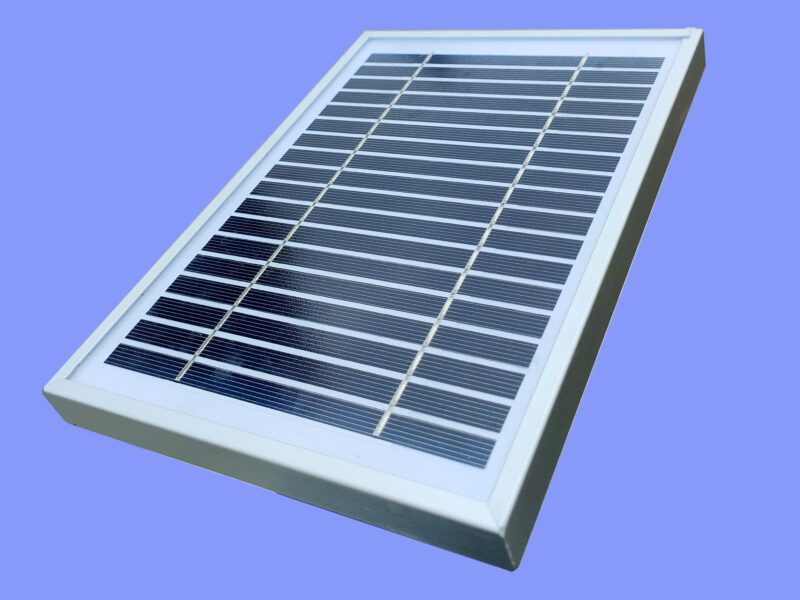
1. Let your solar panel soak up the rays
Arguably the most important piece of the whole set-up process is allowing the panel to absorb some light first. The solar panel is kept in a separate box and will not have seen the light of day for some time. As a result, it’s battery will be completely drained. Not to worry, it doesn’t take much to get it back up and running. Simply place it in bright, direct sunlight for a day to get the battery topped up. It really is just that simple.
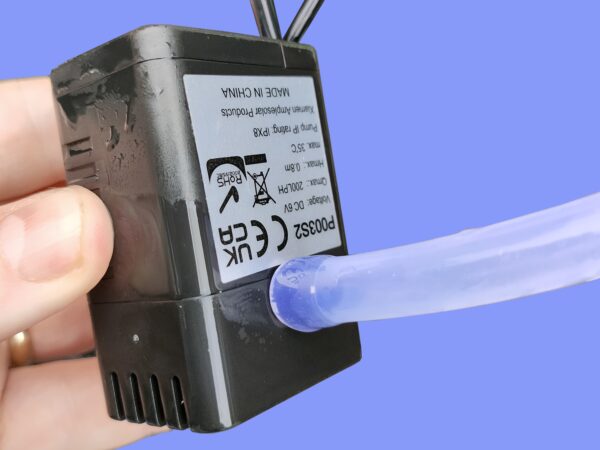
2. Connect up all the pieces
Now that your panel is charged, it’s a process of connecting the correct pieces up. It might look a bit complicated when you take all the pieces out of the box, but in reality it’s very simple. You can’t connect up the wrong pieces together, so it’s all fairly straightforward.
Connect the thin LED Light wire to the similarly thin connection. Make sure that you don’t pull the LED light out when doing so. If you do, gently reinsert it into position. The main issue that people encounter is getting the tube onto the pump. It’s a bit tough, but by splashing a bit of water onto the tip of the tube, it should go on a bit easier. Push the tube as far as it’ll go, like so:
3. Fill with clean water
Again, this is a doddle. Fill the back of the feature with clean water. A watering can will make this very handy. Don’t be surprised if you need to go back a few times – some of the larger units hold a whopping amount of water. Remember: don’t overfill your feature. If you keep pouring, it’ll just overflow our the front – this won’t cause any damage, but it may look a bit unsightly and could make the area around your water feature slippery.
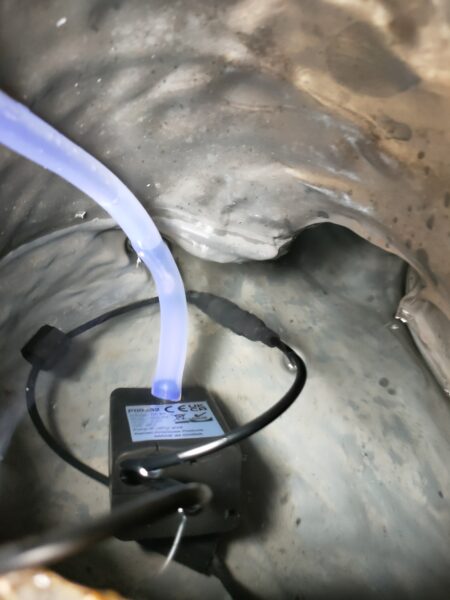
4. Submerge the pump and turn the panel on
Once the unit is filled, place the pump into the water. Ensure that it’s fully submerged and once you’ve done that, press the black, circular button on the back of your water feature to turn it on.
The Water should start flowing through the pump, up through your water feature and cascade it’s way back down into the well of water. If it doesn’t, there’s something wrong. The most likely culprits are:
- A kinked tube. Make sure that the tube that is connected to the pump is not folded over. We advise that you turn off the panel, take out the pump, unkink the tube and gently place it back into place. Restart and it should be fine.
- Pump not submerged. If your pump is making an audible chugging/sucking sound, it’s likely that there is not enough water in the unit, or that the pump is not low enough. Either top the unit up with water or reposition your pump so that it’s fully submerged to solve this issue.
- Dead Panel. You let your panel charge up before you connected it, right? I mean, it was literally the first thing we said. If you’re some sort of giant Silly-Billy however, just allow the panel to charge up in direct sunlight and connect it the next day.
5. Sit back and relax
That’s it. It’s pretty simple right? If you haven’t already you can get your solar powered Water Features from us, either online or in store. And if by some bizarre reason this blog post doesn’t answer all your questions about them, you can get in touch with us and get sorted. We’re also contactable on Facebook or through the live chat – which is that little green-thing down the bottom left of your screen, there.
6. The ‘Too Long, Didn’t Read’ Version: